
Moultrie Pro Hunter II Feeder Kit: A Comprehensive Guide
This guide offers detailed instructions for the Moultrie Pro Hunter II Feeder Kit, ensuring optimal performance and longevity. It covers assembly, programming, operation, and troubleshooting.
Thank you for choosing Moultrie; activate your one-year warranty via moultriefeeders.com/support for enhanced customer service and assistance with your new feeder.
The Moultrie Pro Hunter II Feeder Kit represents a significant advancement in wildlife feeding technology, designed to reliably deliver nourishment to attract and sustain game. This system is engineered for broadcast feed distribution, ensuring a wide coverage area and efficient utilization of feed resources. It’s a popular choice among hunters seeking to manage wildlife populations effectively.
This kit, as detailed in the instruction manual (MFG-13448), provides a robust and user-friendly solution for automated feeding. Whether replacing an older system, like one damaged by bears as seen in recent installations, or establishing a new feeding program, the Pro Hunter II offers dependable performance. The timer functionality, shared with models like the Super Pro Magnum, allows for precise control over feed dispensing schedules.
Understanding the system’s capabilities and following the provided instructions are crucial for maximizing its benefits. The Feed Hub integration offers remote monitoring and alerts, providing peace of mind and ensuring timely refills.
What’s Included in the Kit?
The Moultrie Pro Hunter II Feeder Kit is a comprehensive package designed for straightforward setup and operation. Upon opening, you’ll find the core components necessary for establishing an automated feeding system. These include the feeder hopper, constructed to hold a substantial volume of feed, ensuring less frequent refills. A robust motor powers the dispensing mechanism, reliably distributing feed according to the programmed schedule.
Crucially, the kit contains the digital timer, the brain of the operation, enabling precise control over feed times and durations. Mounting hardware is also included, facilitating secure attachment to a tree or post. The instruction manual (MFG-13448) details each component and provides step-by-step guidance for assembly.
Please note that certain accessories, such as specialized mounting brackets or extensions, may be sold separately to accommodate specific installation needs. Verify all components are present before beginning assembly.
Safety Precautions
Prior to assembling and operating your Moultrie Pro Hunter II Feeder Kit, carefully review these essential safety guidelines. Always disconnect the power source (batteries) before performing any maintenance or adjustments to prevent accidental operation. Exercise caution when lifting and mounting the feeder, as it can be heavy; seek assistance if needed to avoid strain or injury.
Ensure the mounting location is stable and can support the feeder’s weight when fully loaded with feed. Keep hands and clothing clear of the dispensing mechanism during operation. Never attempt to modify the feeder’s internal components, as this could compromise its safety and functionality.
Be mindful of your surroundings when approaching the feeder, particularly in areas frequented by wildlife. Regularly inspect the feeder for any signs of damage or wear, and address any issues promptly. Store the instruction manual in a safe place for future reference.
Assembly and Setup
Proper assembly is crucial for reliable operation. This section details hopper construction, motor and timer installation, and secure mounting procedures for your Pro Hunter II.
Hopper Assembly Instructions
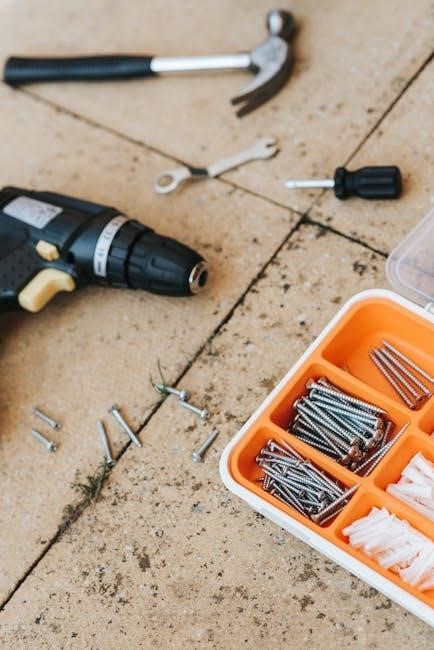
Begin by carefully unpacking all hopper components, verifying all parts are present before proceeding. Attach the hopper sides to the base, ensuring a snug and secure fit using the provided hardware – typically screws or bolts.
Next, connect the hopper top, aligning it precisely with the sides and base. Tighten all fasteners firmly, but avoid over-tightening, which could damage the plastic. Inspect all seams for gaps that might allow moisture or pests to enter.
Finally, ensure the feed exit chute is properly positioned and secured. This chute directs the feed flow towards the dispensing mechanism. A correctly assembled hopper is essential for consistent and reliable feed distribution, preventing jams and ensuring optimal performance of your Moultrie Pro Hunter II.
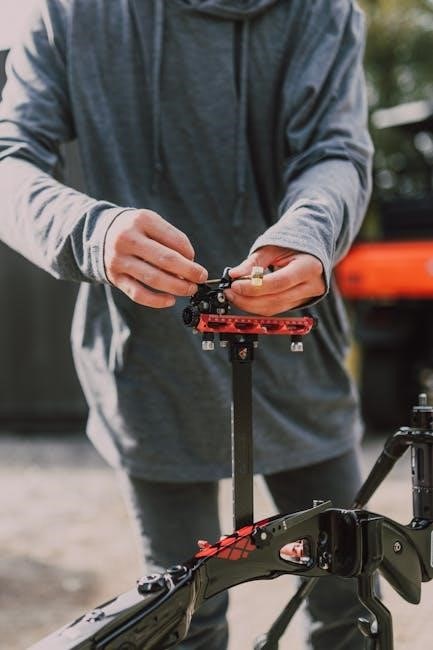
Motor and Timer Installation
Begin by securely mounting the motor assembly to the hopper, aligning it with the designated mounting points. Ensure the motor shaft is properly engaged with the auger, which controls feed dispensing. Connect the timer module to the motor, carefully matching the wiring connectors – incorrect connections can damage the system.
Next, install batteries into the timer, observing the correct polarity. The timer is crucial for programming feed schedules. Double-check all wiring connections for tightness and proper insulation;
Finally, test the motor’s functionality by briefly activating the timer. A correctly installed motor and timer are vital for automated and reliable feed distribution, ensuring your Moultrie Pro Hunter II operates as intended.
Mounting the Feeder

Select a sturdy mounting location, ideally a tree or post, capable of supporting the feeder’s weight when full. Utilize appropriate mounting hardware – brackets or extensions are available as optional accessories for increased stability and positioning flexibility.
Ensure the mounting surface is level to prevent uneven feed distribution. Securely attach the feeder using lag bolts or screws, tightening them firmly but avoiding over-tightening, which could damage the feeder or mounting surface.
Consider the surrounding environment; clear any obstructions that might interfere with the feeder’s operation or access for maintenance. Proper mounting is crucial for safe and reliable operation of your Moultrie Pro Hunter II, maximizing its effectiveness in attracting game.

Programming the Timer
The timer interface allows precise control over feed distribution schedules. Setting feed times, durations, and multiple activations is straightforward, mirroring the Super Pro Magnum feeder.
Understanding the Timer Interface
The Moultrie Pro Hunter II utilizes a digital timer for precise feeding control. Familiarizing yourself with its layout is crucial for effective programming. The timer typically features buttons for setting the current time, feed times, and feed durations.
Key functions include the ability to program multiple feed times per day, adjust the amount of feed dispensed at each setting, and review the programmed schedule. The display will show the current time and the next scheduled feed time.
Pay attention to the timer’s mode indicators, which signify whether you are in setting, programming, or operational mode. Refer to the manual’s diagram for button functions and display interpretations. Understanding these elements ensures accurate and reliable feeder operation, maximizing your hunting success.
Setting Feed Times
To set feed times on your Moultrie Pro Hunter II, begin by entering programming mode using the timer’s designated buttons. Navigate to the feed time setting, typically indicated by a clock icon or similar symbol. Use the up and down arrows to adjust the hour and minute for your desired feeding schedule.
Confirm each setting by pressing the ‘select’ or ‘enter’ button. The timer will store the programmed feed time. Repeat this process for each additional feed time you wish to establish throughout the day. Ensure accurate timekeeping for consistent feed distribution.
Remember to double-check all programmed times before leaving the timer. Proper feed time configuration is essential for attracting game and monitoring activity effectively. Refer to the manual for specific button sequences and display confirmations.
Adjusting Feed Duration
Adjusting feed duration controls the amount of feed dispensed each time the Moultrie Pro Hunter II activates. Access the duration setting within the timer’s programming mode, often represented by a feed icon or similar indicator. Utilize the up and down arrow buttons to modify the dispensing time, measured in seconds.
Shorter durations release smaller portions, ideal for maintaining consistent attraction without overfeeding. Longer durations deliver larger quantities, suitable for establishing initial attraction or during periods of high demand. Experiment to determine the optimal setting for your specific location and game population.
Confirm your chosen duration by pressing ‘select’ or ‘enter’. Regularly monitor feed distribution to ensure the setting aligns with your desired output. Adjust as needed based on observed consumption patterns and environmental conditions.
Programming Multiple Feed Times
The Moultrie Pro Hunter II timer allows for programming several feed times daily, maximizing attraction opportunities. After setting an initial feed time, navigate to the option for adding additional times – often labeled “add time” or a similar function within the timer interface.
Repeat the process of setting the hour and minute for each desired feed time. Ensure each time is distinct to avoid conflicts and optimize feed distribution throughout the day. Consider varying feed times based on game activity patterns observed in your area.
Review all programmed times before finalizing the schedule. The timer typically displays a list of all scheduled feed events. Confirm accuracy to ensure the feeder operates as intended, delivering consistent and reliable feed distribution.

Feeder Operation and Maintenance
Regular monitoring and upkeep are crucial for reliable performance. Initial testing confirms proper dispensing, while consistent cleaning maintains hopper functionality and extends the feeder’s lifespan.
Initial Feeder Test
Before relying on the Moultrie Pro Hunter II for consistent feeding, a thorough initial test is essential. After assembly and timer programming, manually activate a single feed cycle to observe the distribution pattern. Ensure the motor operates smoothly and the feed exits the dispenser without obstruction.
Visually inspect the broadcast range, confirming the feed is spread adequately across the intended area. Adjust the directional features, if equipped, to optimize coverage. Observe the quantity of feed dispensed during the test cycle; it should align with your programmed feed duration settings.
Repeat this test several times, varying the feed duration slightly to fine-tune the system. This proactive step identifies potential issues early, preventing inconsistent feeding and ensuring wildlife consistently benefits from the feeder’s operation. Document your observations for future reference.
Monitoring Feed Distribution
Consistent monitoring of feed distribution is crucial for maximizing the effectiveness of your Moultrie Pro Hunter II. Regularly check the area surrounding the feeder to assess the spread pattern and ensure adequate coverage. Look for areas where feed accumulates excessively or where coverage is sparse, indicating a need for adjustment.
Observe animal activity around the feeder to gauge their consumption rates. This helps determine if the programmed feed times and durations are appropriate for the local wildlife population. Consider seasonal variations in food availability and adjust settings accordingly.
Utilize the Feed Hub integration, if available, for remote monitoring and alerts regarding feeder operation and feed levels. This proactive approach allows for timely intervention and prevents disruptions in feeding schedules, ensuring continued attraction and support for local game.
Cleaning the Hopper
Regular cleaning of the hopper is essential to prevent clogs, maintain feed quality, and ensure reliable operation of your Moultrie Pro Hunter II. Before cleaning, always disconnect the power source – remove the batteries – to avoid accidental activation.
Empty the hopper completely, removing any remaining feed. Inspect the interior for moisture, debris, or old feed buildup. Use a dry brush or vacuum to remove loose material. For stubborn residue, a slightly damp cloth can be used, but ensure the hopper is thoroughly dried before refilling.
Pay attention to the feed dispensing mechanism, clearing any obstructions that may hinder smooth operation. A clean hopper promotes consistent feed distribution and extends the lifespan of your feeder, maximizing its value and effectiveness.
Battery Maintenance and Replacement
Optimal battery performance is crucial for consistent Moultrie Pro Hunter II operation. Use only high-quality alkaline batteries, and avoid mixing old and new batteries. Regularly check battery levels, especially during periods of heavy use or extreme temperatures.
To replace batteries, locate the battery compartment – typically accessed via a secure latch. Remove the old batteries and install new ones, ensuring correct polarity (+ and -). A low battery indicator will alert you when replacement is needed, preventing unexpected feeder downtime.
Consider using a battery case to protect against moisture and corrosion. Proper battery maintenance extends the life of your feeder and ensures reliable feed distribution, maximizing your hunting success and minimizing maintenance efforts.
Troubleshooting Common Issues
Addressing issues like feed dispensing problems, timer malfunctions, motor failures, or connectivity concerns ensures your Moultrie Pro Hunter II operates efficiently and reliably.
Feeder Not Dispensing Feed
If your Moultrie Pro Hunter II isn’t dispensing feed, begin by verifying the hopper contains sufficient feed and isn’t compacted, hindering flow. Inspect the feed tube for obstructions – corn or debris can easily cause blockages.
Next, confirm the motor is functioning correctly; listen for operational sounds during scheduled feed times. A non-responsive motor may indicate a battery issue or a motor malfunction requiring replacement.
Ensure the timer is properly programmed and set to the correct feed times and durations. Double-check the settings to eliminate programming errors. Finally, examine the spinner plate for damage or misalignment, as this directly impacts feed distribution. A damaged spinner won’t throw feed effectively.
Remember to consult moultriefeeders.com/support for further assistance and detailed troubleshooting guides.
Timer Malfunctions
Experiencing timer issues with your Moultrie Pro Hunter II? First, ensure fresh batteries are installed, as low battery power is a common cause of erratic timer behavior. Verify the timer is set to the correct time and date, and that the programmed feed times are accurate.
If the timer screen is blank or displaying errors, attempt a reset by removing and reinserting the batteries. This can often resolve minor software glitches. For persistent problems, consult the manual for specific error code definitions and troubleshooting steps.
Remember that the timer used in the Pro Hunter II is also found in the Super Pro Magnum model, so resources for that feeder may also be helpful. If issues persist, contact Moultrie support at moultriefeeders.com/support for expert assistance.
Motor Issues
If your Moultrie Pro Hunter II’s motor isn’t functioning, begin by checking for obstructions in the feed tube or hopper. Ensure no debris is preventing the motor from turning. Verify the motor is receiving power – test with fresh batteries and confirm proper wiring connections.
Bear damage is a known cause of motor failure; if suspected, replacement is necessary. A common upgrade involves replacing the original motor with a more robust unit. Inspect the motor housing for cracks or damage that might impede operation.
Listen for any unusual sounds during operation, such as grinding or clicking, which could indicate internal motor problems. If the motor runs intermittently, it may be a sign of a failing component. Contact Moultrie support for assistance with diagnosis and potential repair options.
Connectivity Problems (if applicable)
If utilizing the Moultrie Feed Hub integration with your Pro Hunter II, connectivity issues can arise. First, confirm your feeder is within the cellular network’s range, as signal strength is crucial for data transmission. Ensure the SIM card is properly inserted and activated according to Moultrie’s instructions.
Check the Feed Hub app for error messages indicating connection problems. Restarting both the feeder and your mobile device can often resolve temporary glitches. Verify your Feed Hub subscription is current, as expired accounts will lose connectivity.
Low battery levels in the feeder can also disrupt connectivity. If problems persist, consult Moultrie’s support website (moultriefeeders.com/support) for troubleshooting guides and potential solutions related to network compatibility and device settings.

Advanced Features & Accessories
Explore optional accessories like mounting brackets and extensions for customized placement. Feed level indicators and Feed Hub integration enhance monitoring and control of your Pro Hunter II.
Remote Control Operation (if applicable)
While the standard Moultrie Pro Hunter II Feeder Kit doesn’t inherently include remote control functionality, certain models or add-on accessories may offer this convenience. If your kit features a remote, it typically allows for on-demand feed dispensing, bypassing the programmed timer schedule. This is exceptionally useful for attracting game quickly or testing feeder operation without waiting for a scheduled distribution.
To operate the remote, ensure it’s paired with the feeder’s receiver unit – consult the separate remote control manual for specific pairing instructions. The remote usually has buttons for dispensing feed, adjusting settings, and potentially checking battery levels. Always maintain clear line-of-sight between the remote and the feeder for reliable communication. Remember to replace remote batteries regularly to ensure consistent performance. Explore the Moultrie website for compatible remote control options if your kit doesn’t include one.
Feed Level Indicators
The Moultrie Pro Hunter II Feeder Kit often incorporates features to help hunters monitor remaining feed levels, preventing unexpected empty feeders. While specific indicators vary by model, common methods include a transparent hopper section allowing visual inspection of the feed volume. Some advanced systems integrate with the Moultrie Feed Hub, providing remote feed level monitoring via a smartphone app.
Regularly checking the feed level, either visually or through the Feed Hub, is crucial for maintaining consistent hunting success. Low feed levels can disrupt established feeding patterns. The Feed Hub not only displays current levels but also sends alerts when a refill is needed, ensuring timely replenishment. Accurate monitoring minimizes wasted trips and maximizes the effectiveness of your feeding strategy. Prioritize consistent observation for optimal results.
Moultrie Feed Hub Integration
The Moultrie Feed Hub significantly enhances the functionality of the Pro Hunter II Feeder Kit, offering remote monitoring and control capabilities. This integration allows hunters to check feeder status, including feed levels and battery life, directly from their smartphones. Real-time alerts notify users of low feed, low battery, or operational issues, minimizing the need for frequent physical checks.
Connecting your feeder to the Feed Hub requires a compatible cellular data plan. Once connected, you can adjust feed times, durations, and even remotely activate the feeder for testing. The Feed Hub provides peace of mind, knowing your feeder is operating as expected, even when you’re away. It streamlines feeder management and maximizes hunting efficiency, ensuring consistent baiting and increased wildlife attraction.
Optional Accessories: Mounting Brackets & Extensions
Enhance the versatility of your Moultrie Pro Hunter II Feeder Kit with a range of optional mounting accessories. Heavy-duty mounting brackets provide secure attachment to trees, posts, or other stable structures, ensuring feeder stability in various terrains. These brackets are designed for easy installation and adjustability, allowing for optimal feeder positioning.
For increased reach and wider feed distribution, consider utilizing feeder extensions. These extensions elevate the feeder’s discharge point, expanding the broadcast area and attracting game from a greater distance; Various extension lengths are available to suit different hunting scenarios and terrain features. Investing in these accessories maximizes the effectiveness of your feeder, improving your chances of success and providing a more convenient hunting experience.

Warranty Information
Moultrie offers a one-year warranty on the Pro Hunter II Feeder Kit; register your purchase at moultriefeeders.com/support for full coverage details and assistance.
Registering Your Feeder
Registering your Moultrie Pro Hunter II Feeder Kit is a crucial step to activate your one-year warranty and ensure access to comprehensive support resources. This simple process allows Moultrie to keep you informed about important product updates, potential recalls, and exclusive offers tailored to your feeder model.
To register, visit moultriefeeders.com/support and locate the warranty registration section. You will need your feeder’s model number, the date of purchase, and your contact information. Having your proof of purchase readily available will expedite the registration process.
Completing the registration not only secures your warranty but also demonstrates your ownership, should you ever need to contact Moultrie customer service for assistance with any operational issues or require replacement parts. Don’t delay – register today for peace of mind!
Warranty Coverage Details
Moultrie’s one-year warranty covers defects in materials and workmanship on your Pro Hunter II Feeder Kit, starting from the original date of purchase. This warranty protects against malfunctions occurring during normal use, as outlined in the product manual. It does not cover damage resulting from misuse, abuse, acts of nature, or unauthorized modifications.
Specifically, the warranty addresses issues with the feeder’s motor, timer, and hopper components. Damage caused by animals, improper installation, or failure to follow the provided instructions is excluded. To make a claim, retain your proof of purchase and contact Moultrie support.

Moultrie’s obligation under this warranty is limited to repair or replacement of the defective part, at their discretion. Shipping costs for warranty claims are the responsibility of the customer.

Contacting Moultrie Support
For assistance with your Moultrie Pro Hunter II Feeder Kit, several support channels are available. The primary resource is the official Moultrie website: www.moultriefeeders.com/support. Here, you’ll find a comprehensive FAQ section, troubleshooting guides, and downloadable manuals, including the one for your kit.
Direct support can be accessed through their online contact form, allowing you to submit detailed inquiries. Moultrie also provides customer service via email and phone; specific contact details are listed on their website’s support page. When contacting support, have your feeder’s model number and date of purchase readily available.
Social media channels, like Facebook and Instagram, can also be used to reach Moultrie for quick questions or to connect with other users. Expect response times to vary depending on the channel and inquiry volume.